Upload to Box from an Email
Postbox's Quick Post feature enables you to quickly set up and use send-to-service email addresses. Best of all, you can send content to the service in the background, without having to open up a compose window.
With Box, you can save attachments in emails directly into Box using your unique Box email address. Save your tickets, photos, weekly automated reports, or anything you receive in an email, to Box, and access them from anywhere. Note: Only the email attachments, not the message, will be uploaded to Box. A limit of 50MB for the message body and the attachments applies to all users.
Find your Box email address
Each Box folder can be assigned a unique address you can use to save email attachments into Box and looks something like this: [email protected]. To find your Box email address, within Box go to your folders:
Select the "…" next to the folder you want to assign an email address > Settings > Uploading > Email Uploads > check "Allow uploads to this folder via email". Once this option is checked, an email address will be generated under the checkbox. Save this email to your clipboard. Make sure to click "Save Changes" in the upper-right.
Create your Quick Post
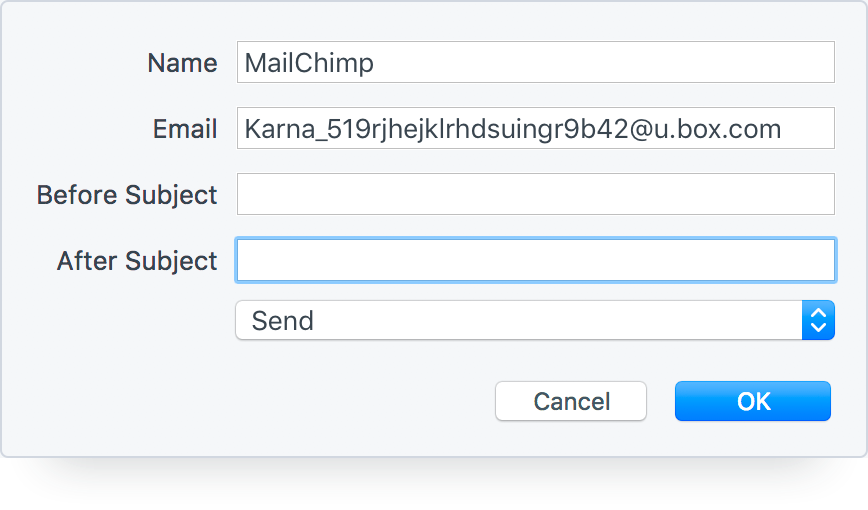
In Postbox, navigate to Preferences or Options > Advanced > Quick Post and then click the + button to create a new Quick Post.
Create a name for the Quick Post, then enter your Box email address.
Nesting Quick Posts
Quick Posts can be nested by including "Parent Menu::" before the Direct Post name. For example, say you have the following Box folders:
- Photos
- Tickets
- Reports
When setting up the Quick Posts for each folder, you can then name them:
- Box::Photos
- Box::Tickets
- Box::Reports
When you access your Quick Posts, those three options will then appear under the parent menu "Box". You can select one of these options under the parent menu to send the attachment to a specific folder.
Specify how the message should be sent
Send As Attachment is usually the best way to go since you're forwarding the original email. Services can then do the right thing with regards to images as attachments, for instance.
Send should be used when the service doesn't know how to process .eml files as attachments, like Trello or Slack. However, it does have some limitations. For example, images embedded into the message body as an IMAP URL won't show in the destination.
Send via Compose Window will bring up the Compose Window, which you can then edit before sending. This option is also the best one to use for images embedded into the message body as an IMAP URL.
Automatic email filtering or forwarding
You can also set up Postbox's email filters to automatically trigger a Quick Post when you receive an email from a specific sender or with a particular subject.
For example, you can configure Postbox to quick post any emails sent from "Co-worker A" with "Product Update" in the subject line to your general mailing list.
To set this up, go to Postbox's Tools menu > Message Filters > New, set your filter criteria, then for the action select Quick Post and then your desired Quick Post.
But note that messages are always sent As Attachment when using a filter action because, by their nature, filter actions run in the background. So be sure to select "Send as Attachment" within the editor panel for this Quick Post.