
Share Emails in Basecamp 3
Postbox's Quick Post feature enables you to quickly set up and use send-to-service email addresses, and automatically add the appropriate tags to the beginning or end of the subject line. Best of all, you can send content to the service in the background, without having to open up a compose window.
With Basecamp 3, you can share and discuss emails with your team, and reply to those emails using your Basecamp 3 email address. Note: forwarded emails have a limit of 25MB for all plans.
Find your Basecamp 3 email address
First, the Forwards tool must be turned on in your project. Go to the project settings and scroll to the bottom of your active tools. Find and click on "Change tools (add Email Forwards)". You will see a list of tools and toggle on "Email Forwards".
The generic email address to send emails to Basecamp 3 is [email protected]. If you use this email address, you will have to tell Basecamp 3 where you want to store the email. Emails will be stored in the Email Forwards tool of the selected project.
If you want to forward emails directly to a project without having to tell Basecamp 3, you will need to find the special address for a project in the project's Forwards settings. An email address will be generated by Basecamp to forward directly to that project and it will look something like this: [email protected].
If you already have some forwards saved to a project you can click on "Forward an email in" in your Forwards tool. The email address will be generated for that project. Copy and save to your clipboard to save in Postbox.
Create your Quick Post
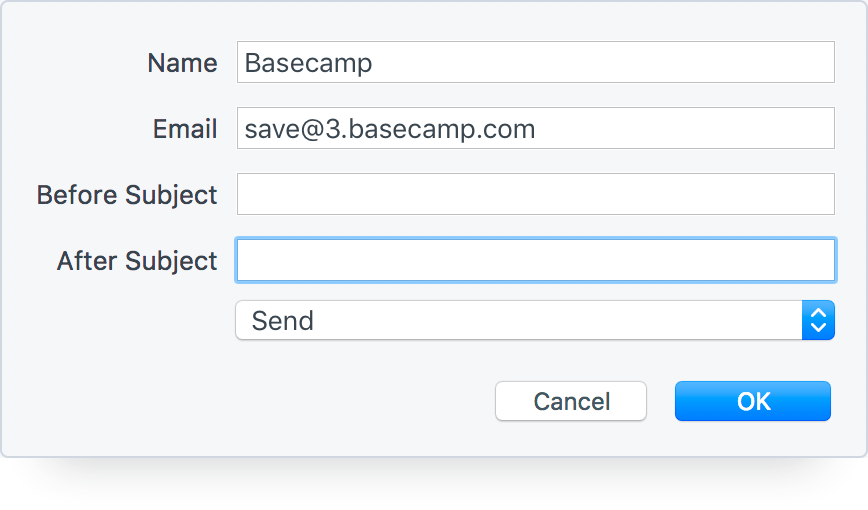
In Postbox, navigate to Preferences or Options > Advanced > Quick Post and then click the + button to create a new Quick Post.
Create a name for the Quick Post, then enter the Basecamp 3 email address.
Nesting Quick Posts
Quick Posts can be nested by including "Parent Menu::" before the Direct Post name. For example, say you have the following Basecamp 3 projects:
- Project 1
- Project 2
- Project 3
When setting up the Quick Posts for each project, you can then name them:
- Basecamp3::Project 1
- Basecamp3::Project 2
- Basecamp3::Project 3
When you access your Quick Posts, those three options will then appear under the parent menu "Basecamp3". You can select one of these options under the parent menu to forward to that project.
Specify how the message should be sent
Send As Attachment is usually the best way to go since you're forwarding the original email. Services can then do the right thing with regards to images as attachments, for instance.
Send should be used when the service doesn't know how to process .eml files as attachments, like Trello or Slack. However, it does have some limitations. For example, images embedded into the message body as an IMAP URL won't show in the destination.
Send via Compose Window will bring up the Compose Window, which you can then edit before sending. This option is also the best one to use for images embedded into the message body as an IMAP URL.
Automatic email filtering or forwarding
You can also set up Postbox's email filters to automatically trigger a Quick Post when you receive an email from a specific sender or with a particular subject.
For example, you can configure Postbox to quick post any emails sent from "Your boss" with "Project 1" in the subject line to the Project 1 folder.
To set this up, go to Postbox's Tools menu > Message Filters > New, set your filter criteria, then for the action select Quick Post and then your desired Quick Post.
But note that messages are always sent As Attachment when using a filter action because, by their nature, filter actions run in the background. So be sure to select "Send as Attachment" within the editor panel for this Quick Post.